Here’s a step-by-step photo tutorial of paper piecing in a quilt block, perfect for beginners who haven’t tried this technique yet. The other parts of the block use regular piecing.

Where did the month of March go? It flew by in a blur of pattern writing, quilt making, and meditating while dog walking; that’s where! I am excited to say that I made it all in one piece to this side of Spring and am ready for new adventures.
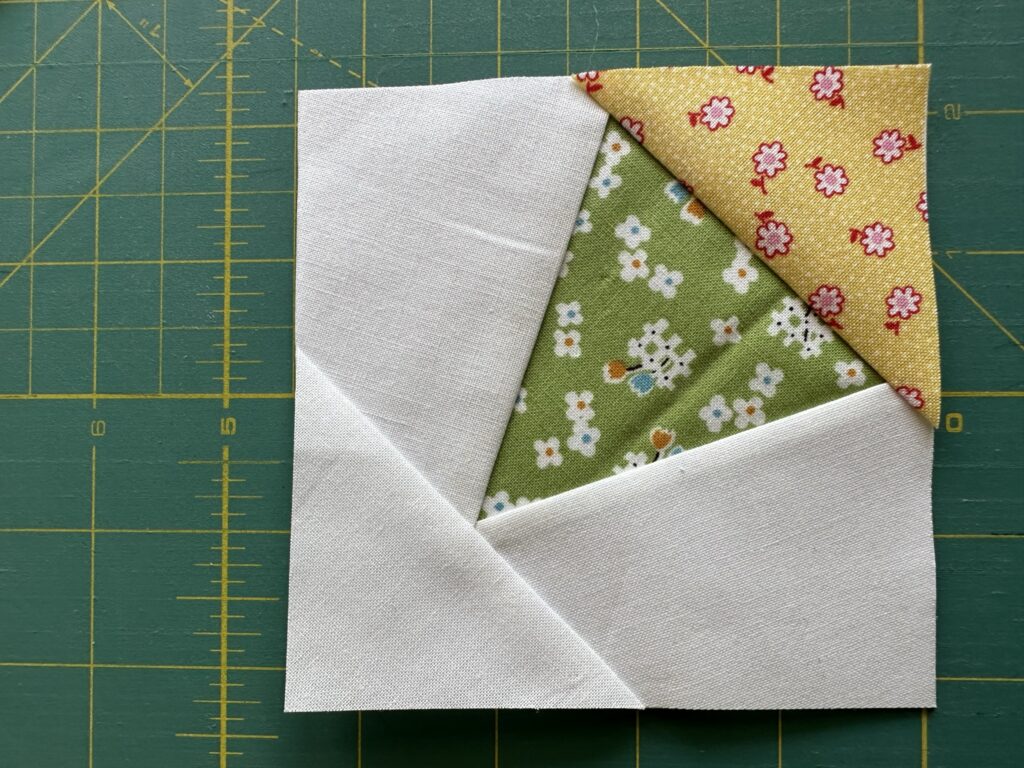
The other day I was testing a pattern and made this block with paper pieced corners. I did trim it after I took this photograph – those pesky triangle bits on the sides – and lightly starched it to ensure all the seams were flat. The block finished at a beautiful 12-1/2″ size, just as I wanted it.
As I have been doing for years, I used the same fabric collection for the blocks I was testing. Soon, I will have enough blocks to make another sampler quilt. Here is one I recently put together and will have the pleasure of binding once it comes back from the quilter:
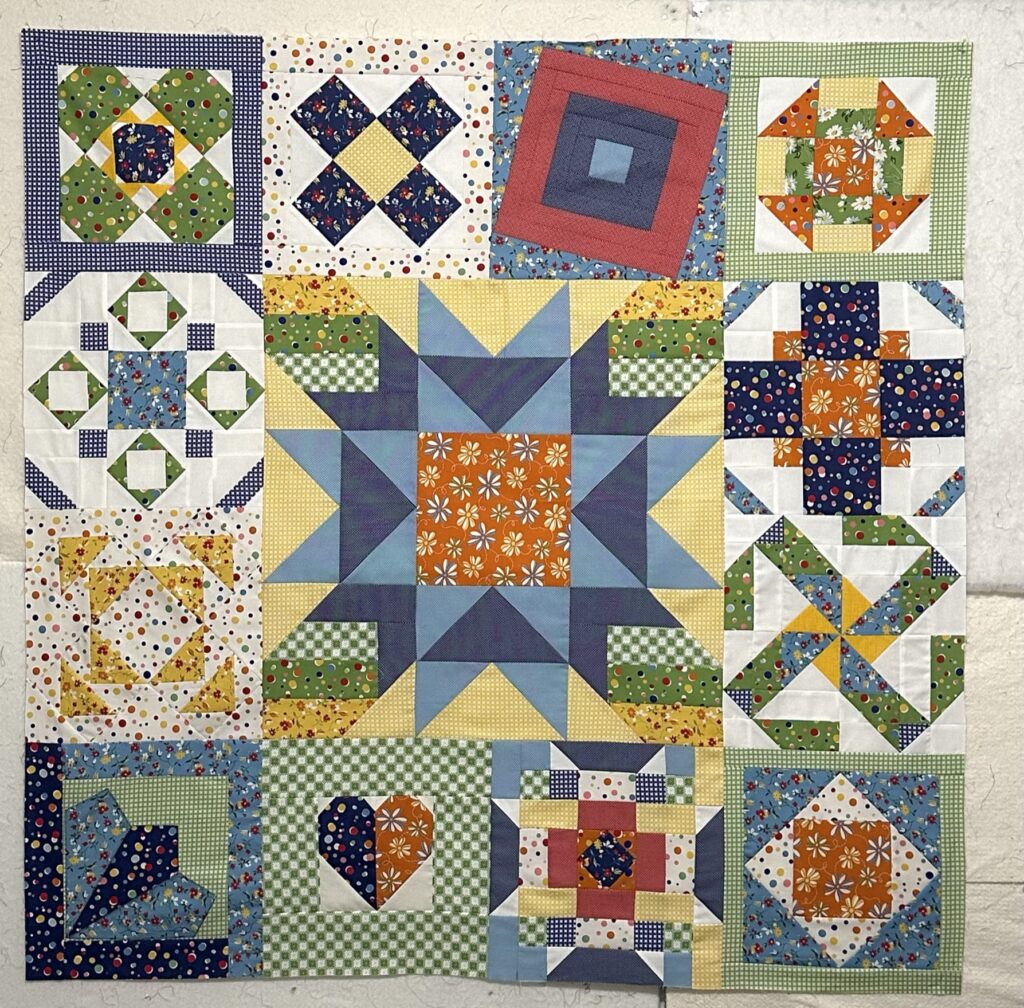
The blocks in this no-name quilt are part of different patterns I wrote. By choosing fabric for them from the same collection or fabrics that go together well, after a while, I spend a short time staring at my design wall as I move blocks around to come up with a layout that appeals to me. Then, I quickly stitch them together, and voila! But I digress.
Today I will show you how I paper piece a block or section of a quilt block. There is another method that uses freezer paper, but I am yet to try it. As soon as I do, I will make a tutorial for you.
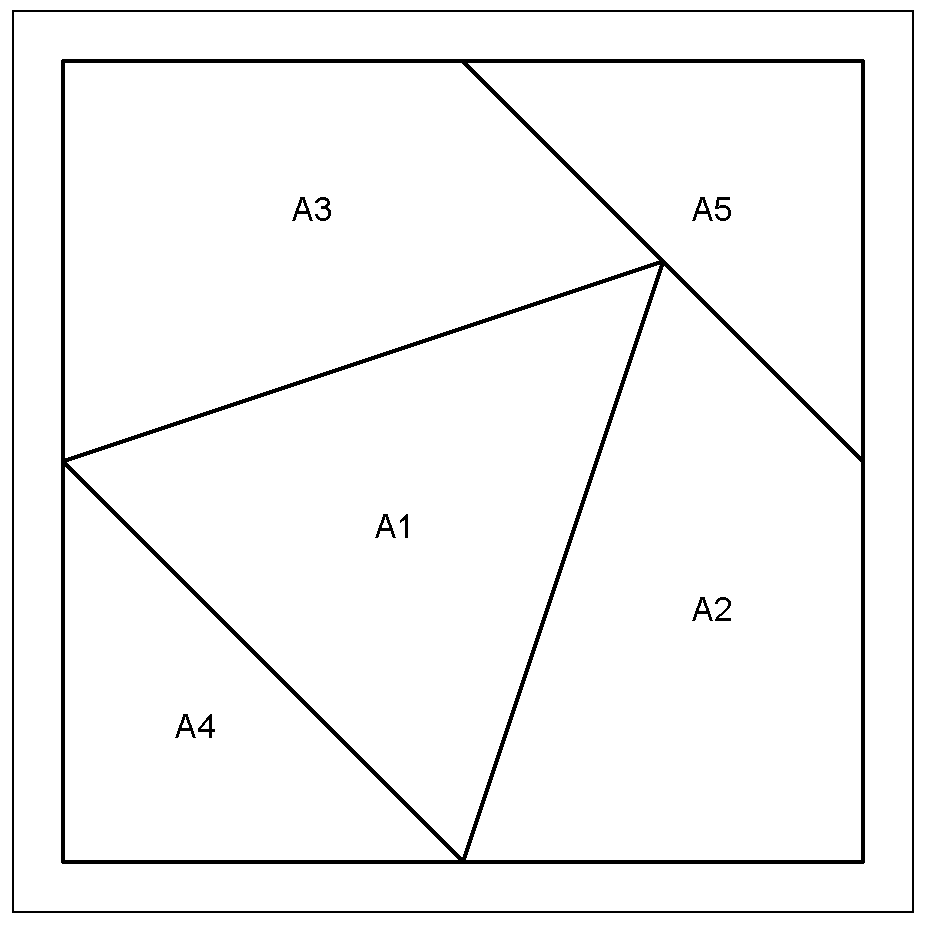
This is the template for paper piecing in a quilt block – and only the corner of the block. It is very simple and uses easy-to-handle sizes of fabric pieces. I used to print templates onto special foundation piecing paper – no more! I learned to use printer or copier paper because they are so much easier to remove in the end. In fact, maybe one tiny piece of paper gets stuck to the stitches. Maybe. I remove it using tweezers.
What you will need:
- Printer or copy paper
- Add-a-quarter ruler
- Cutting mat and rotary cutter
- Sewing machine and supplies


- After printing the template, cut all around it, leaving about 1/4″ or so outside its outer line. This excess will be trimmed after you complete the stitching. Usually, the patterns will tell you the size of the pieces for each section, so place the first piece on the back of the template (1), making sure the fabric extends at least 1/4″ beyond the stitching lines; otherwise, you will be in trouble.
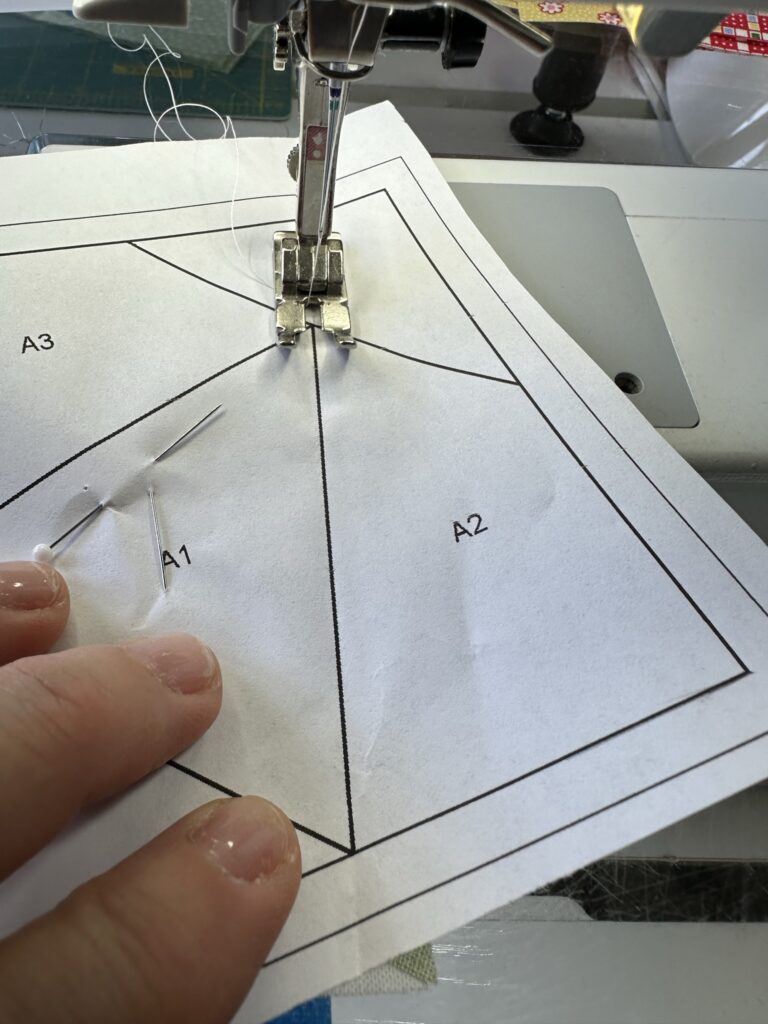
- With right sides together, pin the fabric for the next section to the first fabric (2), flip the template onto its printed side, and stitch on the line between the sections (on the photo above, the line between sections A1 and A2). Notice that you need to reduce the length of your stitches to 1.6 or so – to facilitate paper removal – and you begin stitching about 1/8″ or so before the line begins and go beyond the end of the line a few stitches, too (3,4).


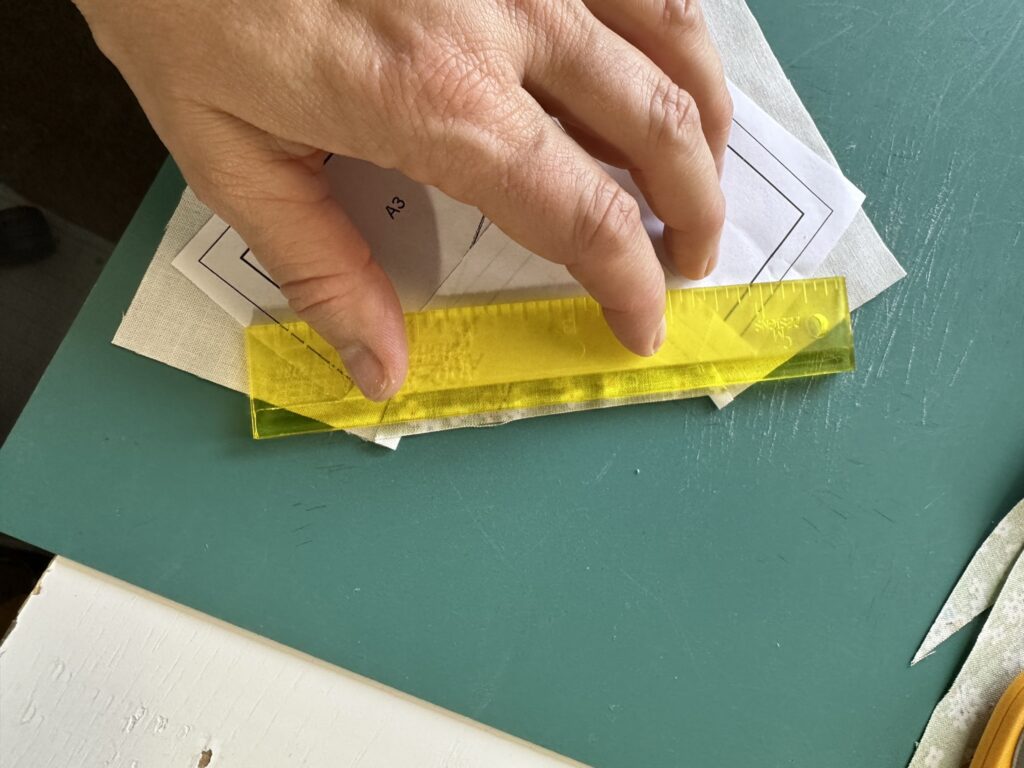
3. Finger press the fabrics open (5), flip the template to its printed side, and fold back the paper on the next stitching line between sections A1 and A3 (6). Align the lip of the Add-a-Quarter ruler against the folded paper and trim the excess fabric to 1/4″ (7).


4. Pin the fabric for section A3 to the trimmed edge – notice how the pin is placed far away from the line where I will stitch (8), flip the template over and stitch on the A1/A3 line (9). Turn the template over and finger-press open (10).


5. With the right side of the template facing you, fold the template on the A1/A4 line (11), align the ruler with the edge of the fold and trim (12), pin the section A4 fabric (13), flip over, stitch, and finger press open (14).


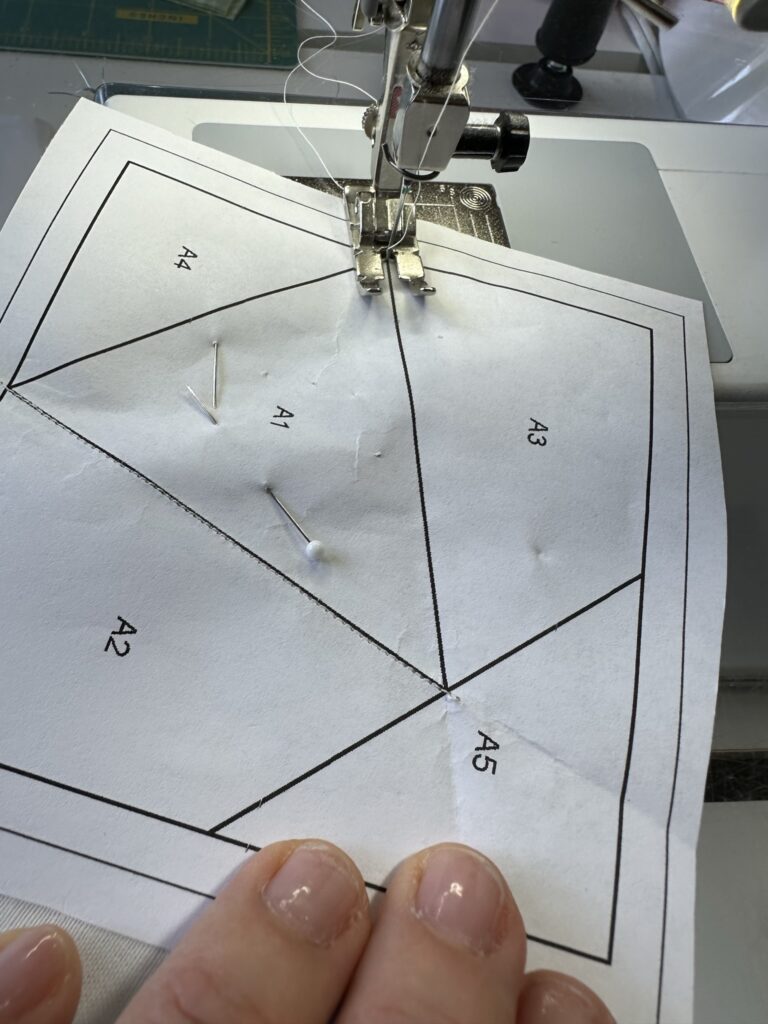
6. Fold the template on the A1/A5 line and trim the excess fabric using the ruler as before (15), pin the section A5 fabric, flip over the template, and stitch on the A1/A5 line (16), and finger press open (16). All the pieces are attached! At this point, I like to press the unit with the iron.


7. Trim the block on the outer line, ensuring there is 1/4″ space after the actual block limits for the seam allowance (17, 18, 19).
8. Remove the paper from the back. You will see how easily it comes off (21).


In Step 2, I asked you to begin stitching before the line and end after the line. As you trim the fabrics after stitching, you will fold the paper back and smooth those stitches out of the way (22, 23).
And this is how you complete the paper piecing in a quilt block. Here is a video tutorial of paper piecing another block, which may also help you.

If you like paper piecing, you may want to try Victorian Fans, where we piece only those fun edges of each block. I also have a tutorial for that – click here. What I love about this design is that we can showcase our favorite large print fabrics on each fan. Do you like it?
Anyway, I hope you had an awesome Easter and that you are ready for the week. I am!

The basic problem that I have with your (and most paper-piecing instructions) is that by using rectangles for each piece, you make the block have biased edges everywhere. I much prefer a method that cuts one pattern apart and uses each part as a template. Place the template on the fabric so that the “outside edge” is on the straight grain. Cut the pieces with a generous seam allowance – about 1/2 inch at each side. Then the method is the same for the sewing (place the pieces of fabric right sides together, stitch, and trim). This will make for a more stable block when the outside edges of the block are on the straight grain.
I see your point. Our level of comfort with each technique dictates which one we choose for our projects. I am always learning new ways of doing things.