[Updated on February 3, 2020.]
Many of you loved my quilt pattern “Victorian Fans“. I made this curved paper piecing tutorial with step-by-step photos to show you how to put together those beautiful blocks.

You can feature your favorite prints on the bottom of the fans, then use a contrasting, darker fabric for the tips.

I love paper piecing or, how it is also know, foundation paper piecing. The repetition of the same steps is soothing instead of boring. The results are precise, crisp points which would be otherwise difficult to achieve with regular piecing. In an effort to spread the love, and as I was working on some test blocks for one of my upcoming patterns, I thought I would write a tutorial for the curved paper piecing. For those of us who are relatively new to paper piecing, curved paper piecing may look scary, and here I show you how easy it can be. For straight paper piecing, see my previous tutorial by clicking here.
Tools for paper piecing:
The basic tools I use for paper piecing:
– Regular tracing paper (my favorite lately over all the others)
– Add-a-Quarter© ruler
– Greeting card, postcard, old credit card, or a hotel card key
– Small cutting mat next to the sewing machine
– Rotary cutter
Steps for paper piecing:


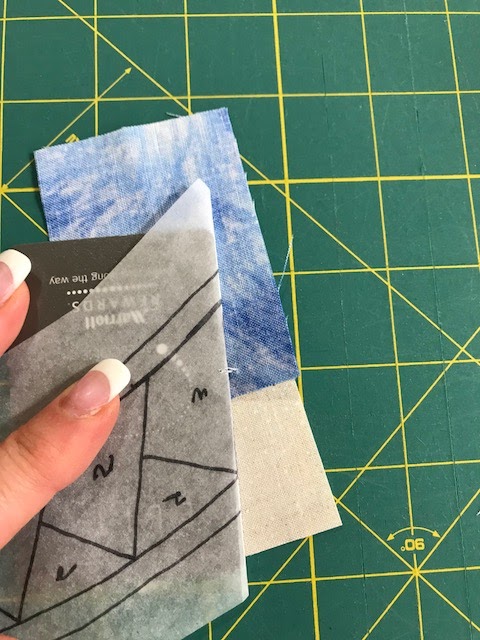
1. With the reverse side of a fan edge foundation right side up, pair patches right sides together, layer the pair on the foundation so edges extend at least 1/4″ beyond all lines of piece 1, and pin. Make sure the fabric which will go on piece 1 is the one touching the paper. Turn foundation over to its marked side and stitch on the line between pieces 1 and 2.
Notice that when I traced the foundation onto the tracing paper I was not too precise with my outside lines. I wasn’t worried about it because I knew my inside lines would be perfect when I stitched them. I was tracing only four times. When you need to make a lot of copies, trace the shape onto the tracing paper three or four times, then stack tracing paper under each of your handmade templates and staple the stacks. Remove the thread from the needle and from the bobbin on your machine, and stitch on the lines. When done, remove staple and separate sheets. This is a fast way to make many copies if you can’t print them over foundation paper.


2. Finger press patches open. Place a postcard or credit card edge against the next stitching line between pieces 2 and 3, fold foundation over the card, align the lip of the Add-a-Quarter© ruler with the edge of the card, and trim the fabrics.


3. Place the second patch over the trimmed fabrics and sew on the line between pieces 2 and 3. Finger press them open and trim the fabrics as before.


5. Continue adding patches till the end. Using sharp scissors, trim the fabrics even with the seam allowance line of the fan edges (the outermost line) and tear away the foundation from the unit.
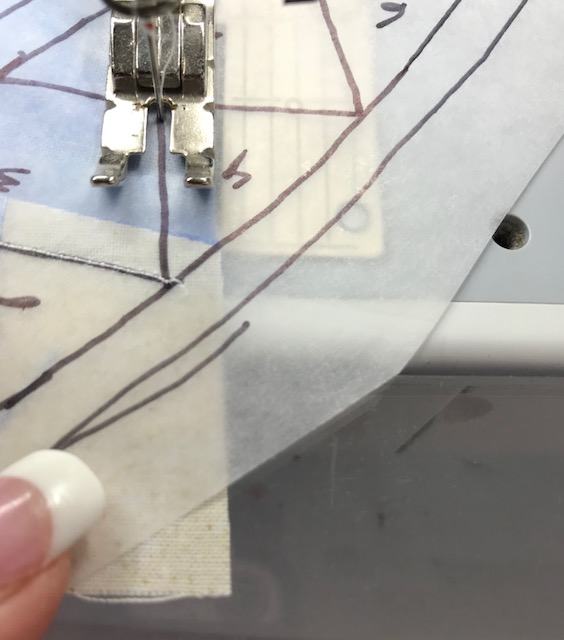
Regarding tearing the paper, I usually tear the paper after the foundation pieced shape has been stitched to another fabric or block. However, stitching curves with paper is not going to work. You will notice below that I chose to tear away the paper along the edge I was going to stitch first, removing the remaining paper when I was ready to stitch the other edge, just to keep the edges stable.

6. Place a paper pieced fan edge over a fan bottom with right sides together. Pin at small intervals, picking up only a few threads each time (you can see I picked up a lot more than just a few threads! Still worked, though when sewing curves it is best to just pick up a few threads at a time.). Sew the pieces together.

7. Layer the top of the fan block right sides together on the fan edges, pin, and sew.

Here is the block again. The pattern Victorian Fans has the templates I used here but, in the meantime, if you see a pattern with a similar curved paper piecing shape, you can refer to this tutorial to help you get it done.
Leave questions with your comments and I will answer them as soon as I see them. Yours can look just like mine if you follow these simple steps.

Thanks for the great tutorial! I love paper piecing, too, but only after about the first hour. I always feel so clumsy when I start and don't even ask how many times I've trimmed the wrong edge before adding the next piece! Maybe a refresher before starting will make that first hour less fretful. Great tip on making multiple copies, too!
That happens to me if I go a long time without paper piecing. I have to use the seam ripper a lot. That is why I manage to make a few projects every year. I am so glad you liked the tutorial!