Use this free quilt block pattern to make a flower with simple paper pieced rectangles as leaves. Repeat the block for a fun one-block wall hanging or lap quilt. Read on for the photo tutorial.
[Edited: June 23, 2020]
This is a ‘hybrid’ flower block. Why? Because the leaves are paper pieced and the flower is made with regular machine piecing. This is a perfect block for those who want to try their hand at paper (or foundation) piecing: a small part of the work is done with that technique, the paper piecing requires only one stitched line, and the quilter practices the basics before plunging into a project solely involving more complex paper piecing.
5 Tips for successful paper piecing:
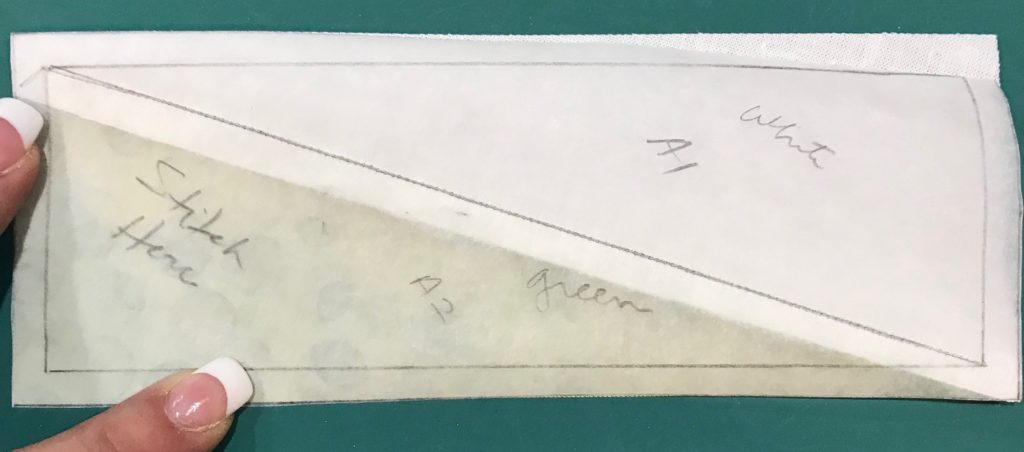
1. Write the color of the fabric which is going on each section on the paper – I only do this for patterns where the same fabrics are used in reversed positions, so I do not accidentally switch them;
2. Write ‘Stitch Here’ on the stitching side even though the sections are labeled (A1, A2) – if I place the fabrics there I see the note and go ‘Oops, I need to place fabrics on the other side’. This is because if you get a phone call or are interrupted by someone, you could easily place fabrics on this side and stitch on the other (ask me how I know!). Train yourself to stitch after you can read ‘Stitch Here’ and you will be safe.
3. Finger press seams after every fabric addition – this way the seams will be perfect and you will not have ‘bulging’ after you add the next section.
4. Use permanent marker if tracing template by hand – pencils will smudge your fingers or fabric and make a mess of things. If you print the templates, be sure the toner won’t bleed either.
5. Check the corners of each section – the fabric piece you are adding must extend beyond the points of that section, or beyond the seam allowance of 1/4″ to prevent holes in the block.

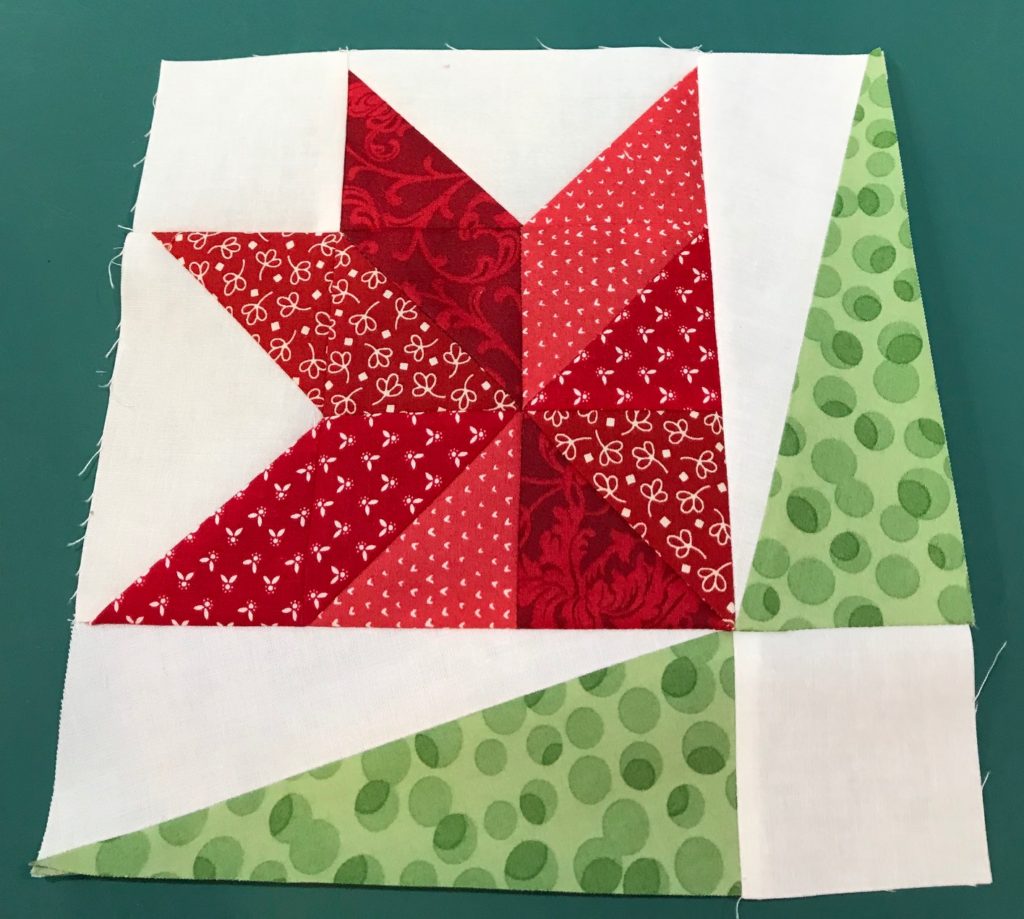
Once I make the flying geese units, I make the half-square triangles and assemble them as the center of the block. I like to lay out the units that make up the block next to my sewing machine, take a photo of it to make sure I have placed them in their correct position, and then get ready to sew.
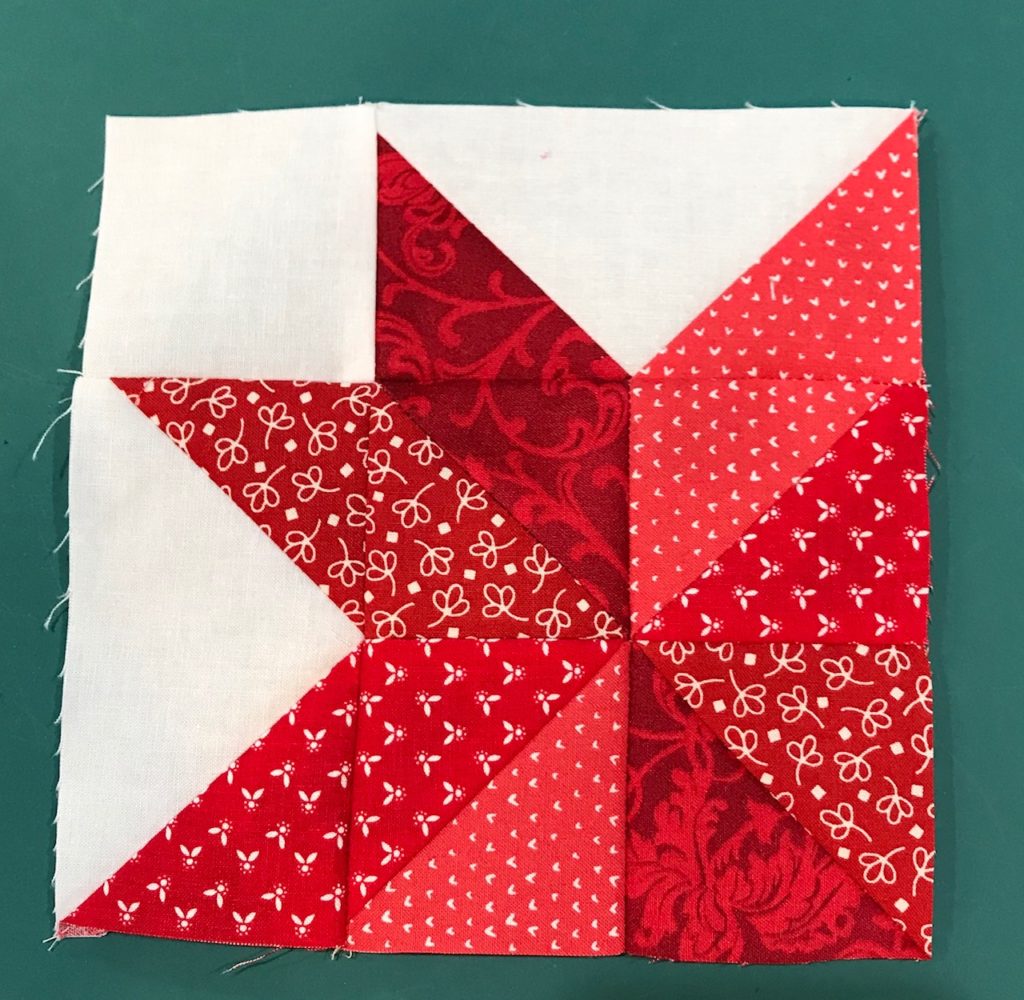
Notice that I repeated the fabrics from the half-square triangles on the corners of the flying geese units, carefully placing them so as to match their counterparts and form the petals.

One of the leaves is stitched. I left the paper foundation attached and will not remove it until the finished block is attached to the other blocks. I could remove the paper, but I wanted to show that, if a block is complex and has lots of points or bias sides, you may choose to leave the paper until the bock is stitched to another one, so all sides are protected and stabilized.
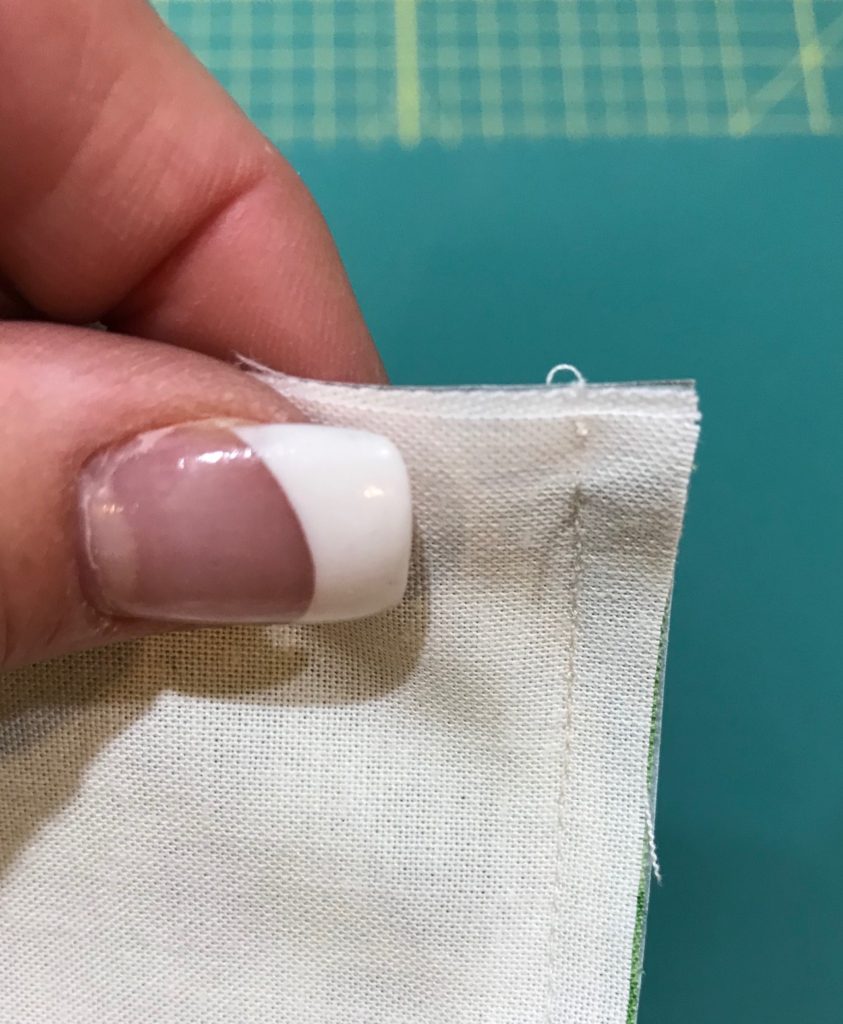
When you are stitching fabric to a paper pieced unit, the paper pieced unit needs to stay on top of the fabric-only patch. Why? If the paper is touching the machine plate, it really does not move as well as fabric would (I am using tracing paper). Also, stitching goes slooowly. So, the above may happen where the fabric slides from the paper pieced unit. I knew this but… you know how it goes. I ripped the stitches and fixed it.

Here is what you’ll need for this free quilt block pattern:
For a 9″ finished block:
A = (2) 2-3/4″ x 2-3/4″ white squares
B = (2) 2-3/4″ x 5″ white rectangles
C and D = (2) 3″ x 8-1/4″ rectangles of each white and green fabrics
E = (1) 3-1/8″ x 3-1/8″ square of each red fabric
F = (1) 2-3/4″ x 2-3/4″ square of each red fabric
Click here for the link to the paper piecing template.
The second white square is stitched to the remaining leaf and the strip is sewn to the bottom of the block. Remove the papers from the back. Easy, right?
With this block, the beginner paper piecer gets comfortable stitching with paper, learns to remove the paper, and learns how to mix this technique with regular piecing in one block. I used this hybrid concept before – check out this post to see the block and published quilt.
When you feel you are ready to try more involved paper piecing projects, check out my paper piecing video tutorial for additional support and information.

On another note, if you missed the interview with Pat Sloan, I am the second guest on the May 6 program – check it out at http://www.allpeoplequilt.com/magazines-more/quilting-podcast.
This week I will be hiding in my studio to finish a very cool BOM which will be announced soon. Have a fantastic Monday!

That is beautiful. Thanks for sharing.
Thanks! It is an easy block to make and it looks so cool. The project I am designing uses it on-point. Will share as soon as fabric company publishes it. Free! :-).