This Paper-piecing tutorial is so easy to follow! With paper piecing, you can create amazing blocks or borders for your quilts!
[Updated 01/08/2024]

I LOVE Carol Doak’s 300 Paper-Pieced Quilt Blocks (I found it here)! It has tons of wonderful blocks, and the possibilities are infinite. The book comes with a CD so you can print the blocks you like when you are ready to start your project.
I usually print a few blocks, then cut and paste them onto a page so I can get as many blocks as possible (sometimes 2, sometimes 4, depending on block size) on one page, making sure I leave about 1/2″ between blocks on all sides. Once that is done, I print the page onto foundation paper (vellum paper) and cut each one. Then, I choose fabrics, cut them per her cutting instructions (Carol Doak tells you the size for each piece – little fabric waste!), and put them together. This is another must-have book for your library.
One note about foundation paper: I’ve switched to regular copy paper lately. It is easy to remove from the back of the blocks, and leave few tiny pieces behind.
Now, onto the tutorial.

Be prepared because this Paper Piecing Tutorial is detailed! Gather all the pieces of fabric and the printed paper foundation blocks. For the fabric pieces, I left the one that will be placed onto the spot marked #1 on the block with the right side up. All the other pieces I flipped upside down, so when it is time to place them on top of the previously sewn fabric, they will already be right side up.
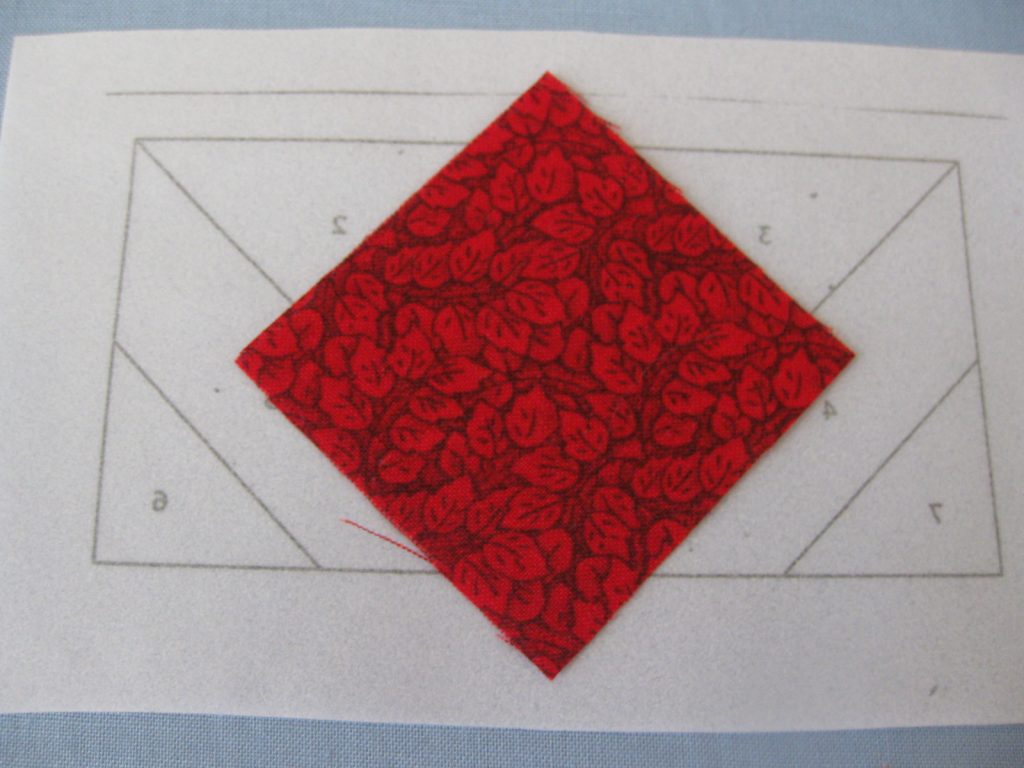
Place the first piece of fabric onto the paper template. The right side of the fabric is facing you, and the template is reversed, so the numbers are all backward.
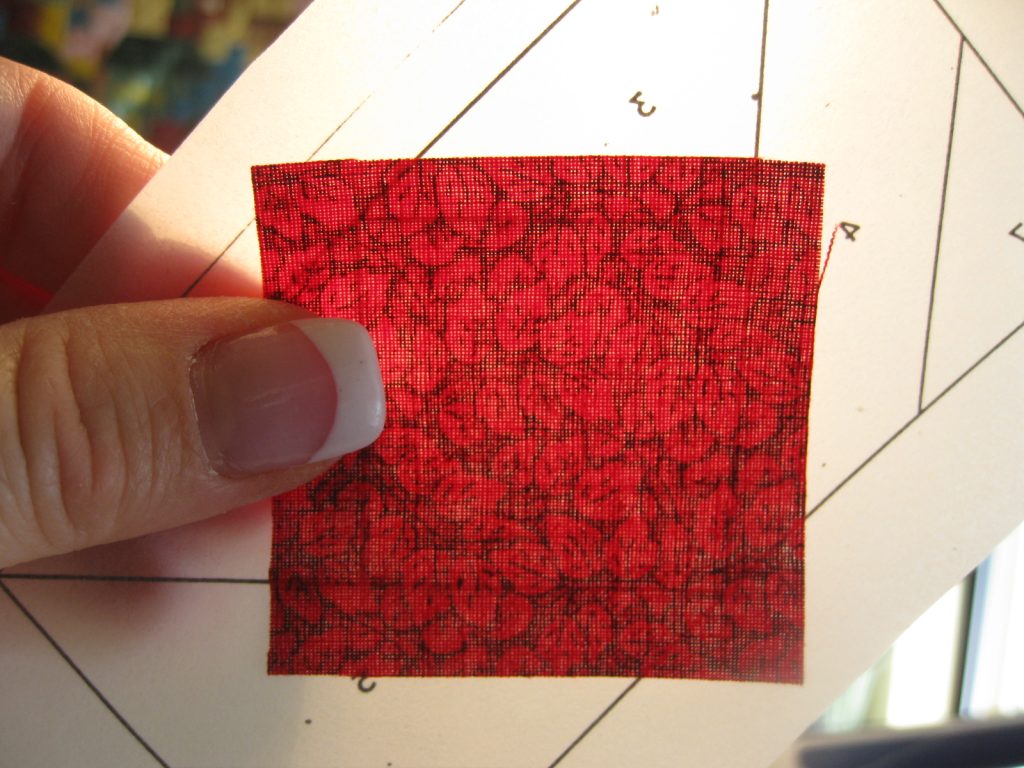
Hold the paper and fabric up to a light source in order to ensure that the edges of the piece of fabric extend beyond the solid lines of part #1 by at least 1/4″ (this will be your seam allowance). Now, place the next piece of fabric, in this case a beige triangle, onto the first piece of fabric. Where? Well, you will be sewing on the solid line between sections 1 and 2, so you will align the triangle’s edge with the first piece’s edge there.

After you have aligned the edges of the two fabric pieces, fold back the second one to check if it is placed correctly and that its edges also extend beyond the outer lines of the template! You can see (I hope!) on the left side of this picture that the beige triangle extends beyond the left and top outline.

Since you will be sewing on the line between sections 1 and 2, the pin should not be in the way. In short, you will always be placing the fabrics on the reverse side of the paper template, pinning, flipping, and sewing on the right side of the paper.

Reduce the length of the stitches to about 1.6. Always start sewing a few stitches before the line and end a few stitches after the line. These extra stitches will be undone in another step.

Place a note card, postcard, or credit card against the line you will sew next, in this case, the line between block sections 1 and 3.

Fold the paper back over the postcard to expose the seam allowance, so it can be trimmed to the right size: 1/4″. Remember the extra stitches at the start and end? Here is where you will smooth the seam allowance and undo them so the fabric lays flat for the next step.
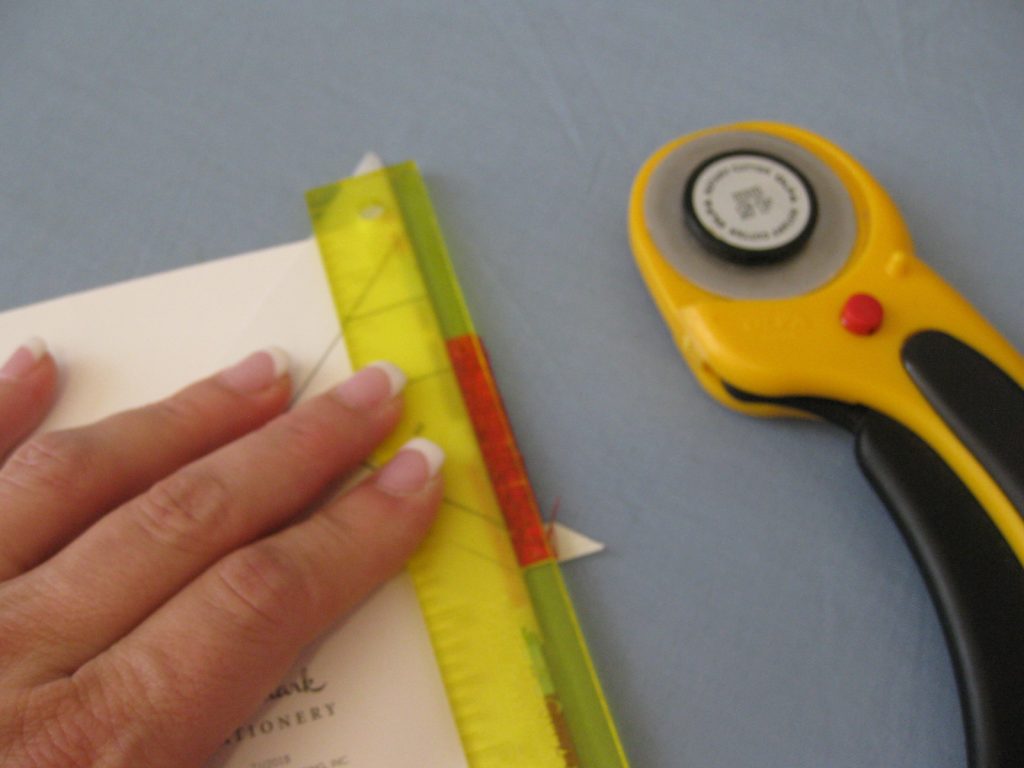
Trim the excess fabric with an Add-a-quarter ruler or regular acrylic ruler and a rotary cutter. I like the Add-a-quarter because it has a lip that snuggles against the folded edge.

Finger-press the fabrics open to get ready for the next addition.
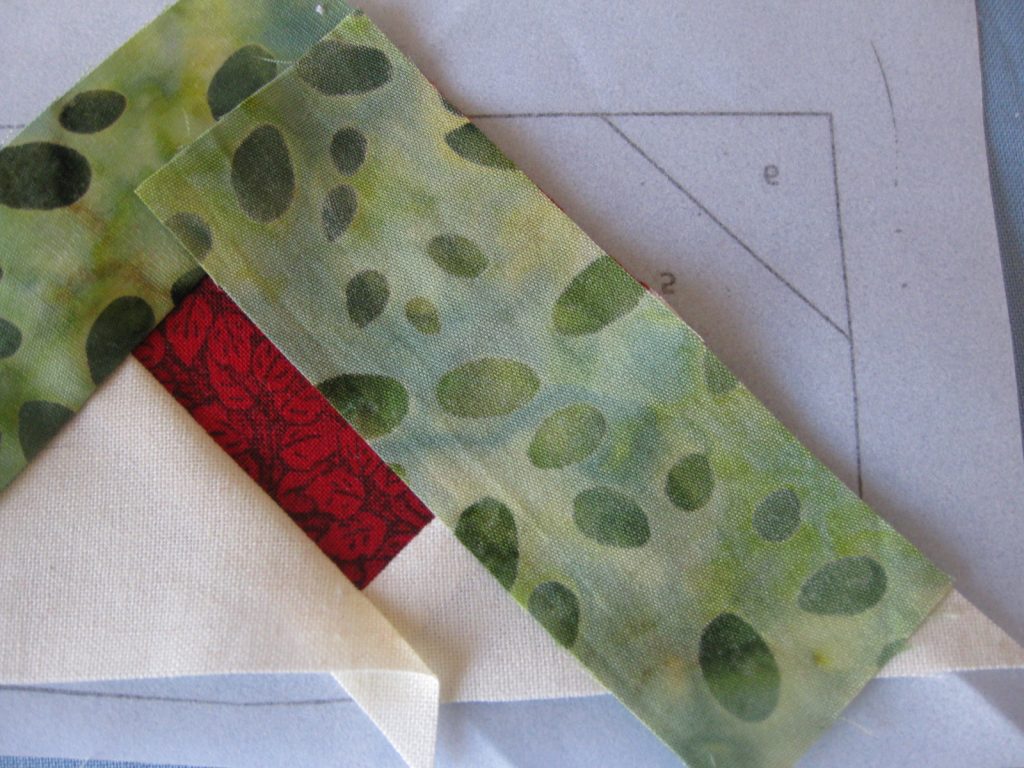
Align the next piece of fabric with the edge of the first piece, right sides together, and on the line between sections 1 and 3.

Again, check to ensure all the edges of the new piece will clear the outlines of the paper template.

Flip the template and sew on the line, adding a few stitches at the start and end of the line.

Again, with the right side of the paper facing you, place a note card against the next line you will sew…

… fold the template back over the card, exposing the excess fabric you will trim to ensure it measures 1/4″.

Trim using the ruler and the rotary cutter.

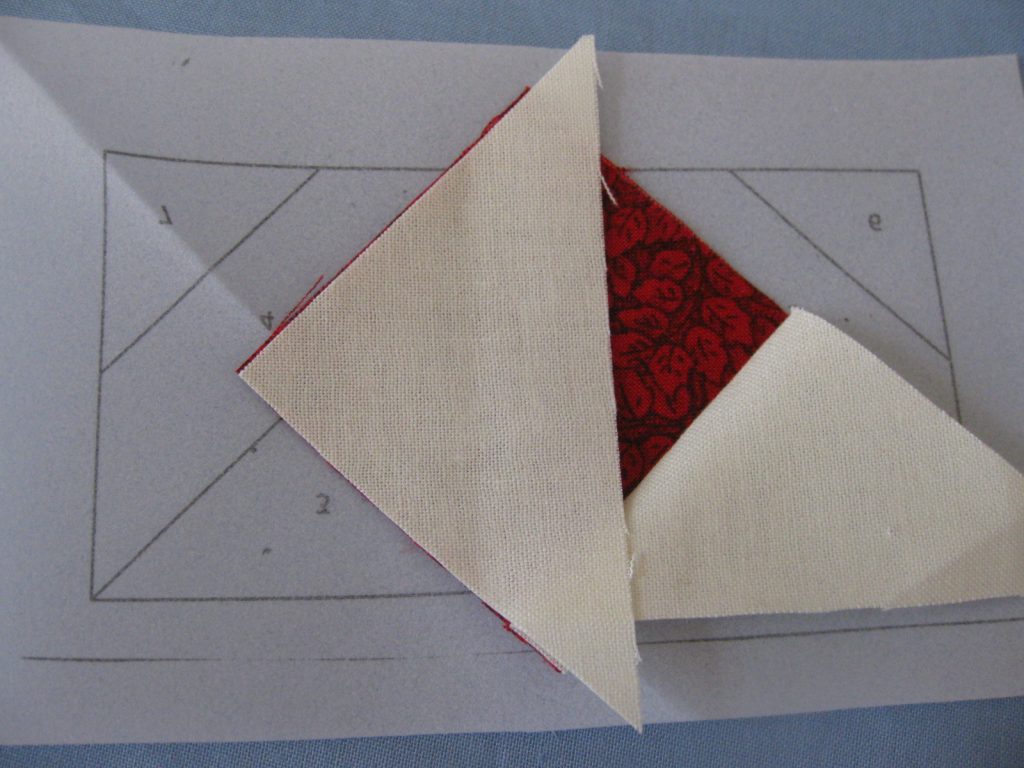
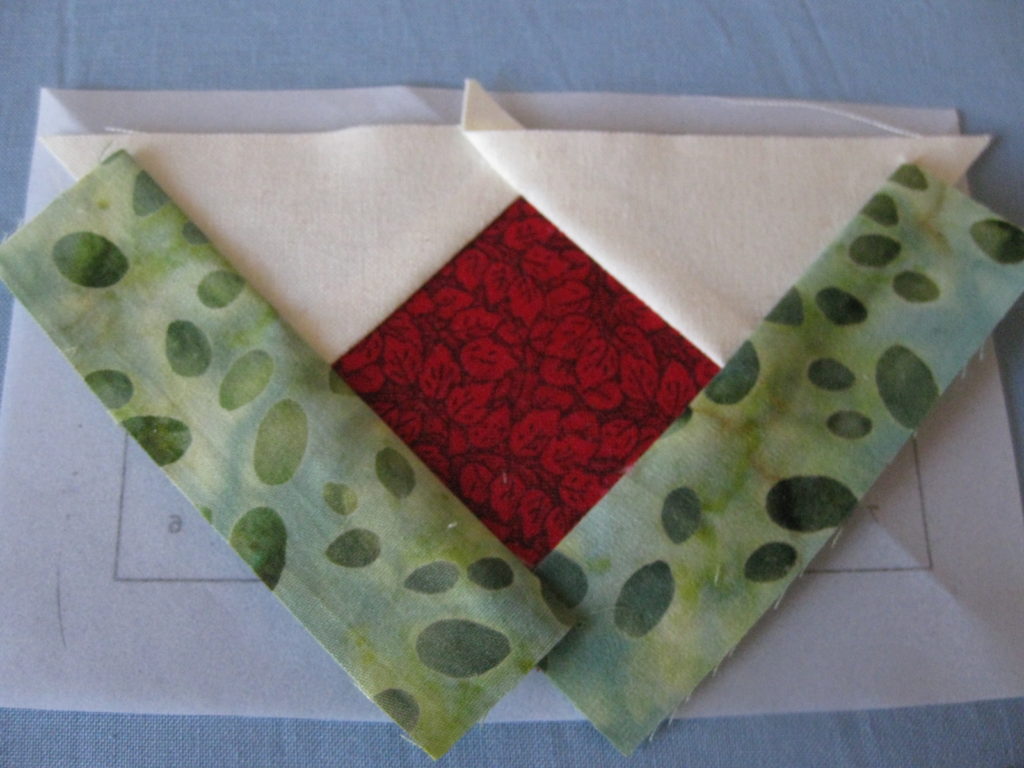
Flip it and align the next piece of fabric to the edge you have just trimmed, so you can sew on the line between sections 3 and 4.

Make sure the new piece of fabric extends beyond the solid lines all around the template.
By now, you got it. Repeat the same steps until you have sewn all the pieces to form the block. This process is simple and very relaxing. You know where to go next because the numbers are printed on the templates.
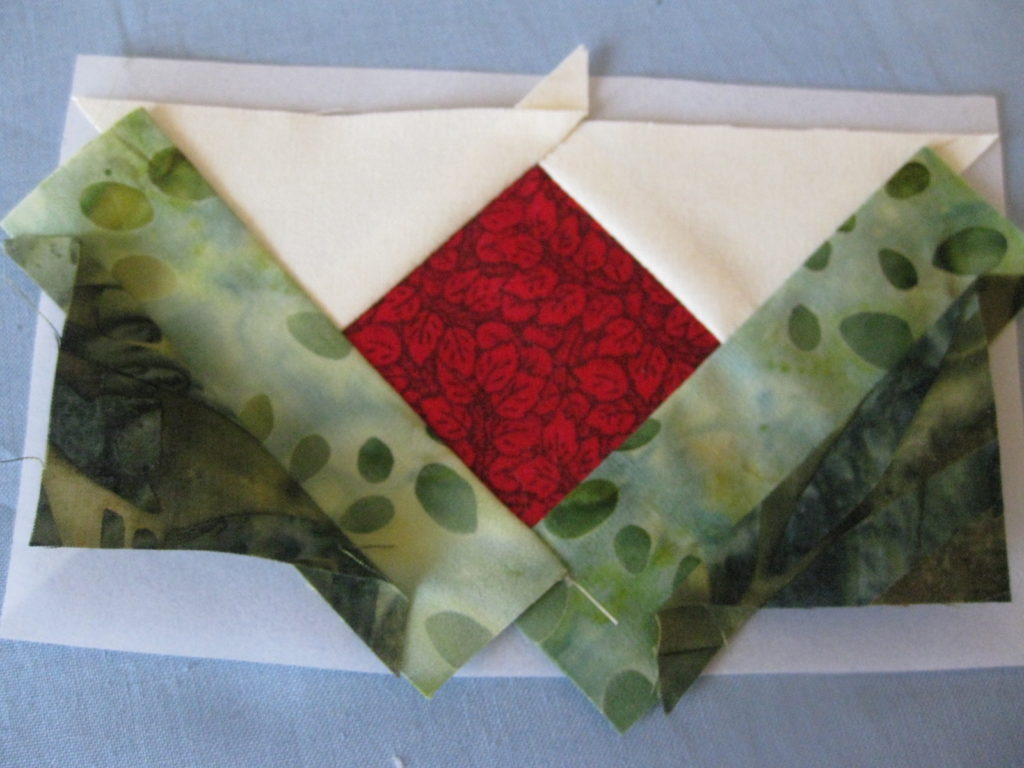

Finally, with the right side of the template facing you and the fabrics on the other side, place the 1/4″ mark of your ruler onto the outlines of the template, and trim the block all around.

You can now join all blocks together. Do not remove the paper until the blocks are stitched to the rest of your work, which will ensure the edges of the blocks are secure and won’t distort. When removing paper next to the seams, tweezers may come in handy.
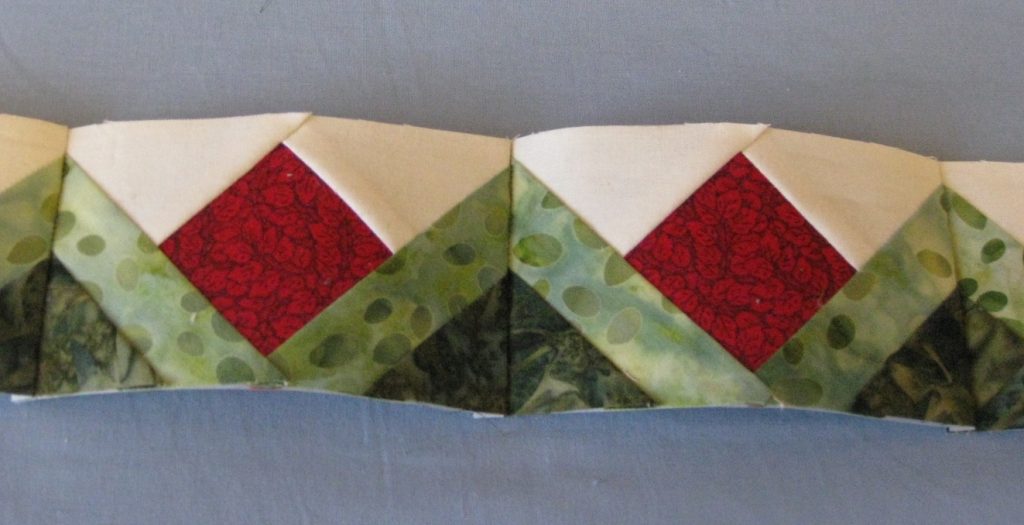
Voila! Where you could use this, you ask? I used this around a friend’s center block:
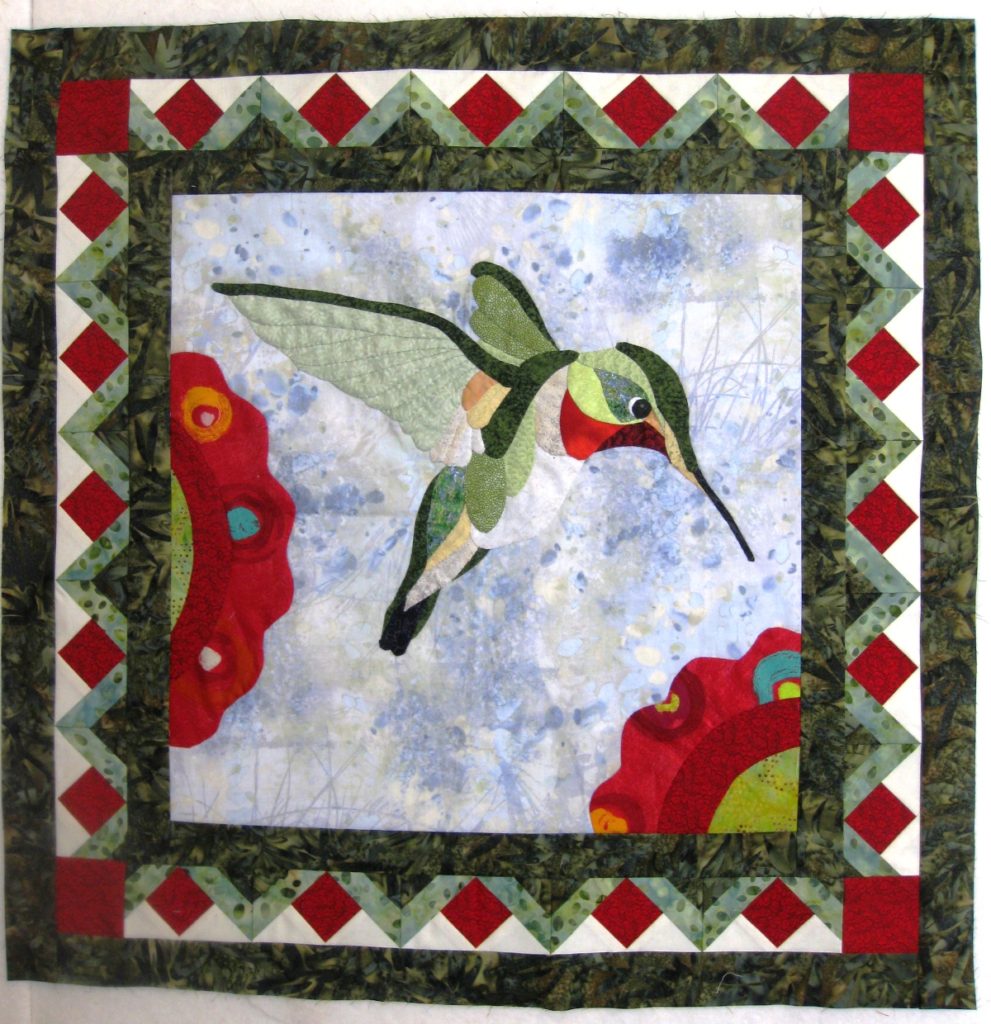
My friend Sue made the center block. I was next in the Round Robin and decided to add a paper-pieced border. Read about it here. I love how it turned out! Since she used batiks, my border was also made with batiks.
I hope I have inspired you to try paper-piecing with my Paper Piecing Tutorial!

This was good! I'd still like to have you in my sewing room for the first time or two LOL!
Thanks, Kathy! I am sure that after you do one block you will become a pro! Just go for it! On the other hand, I love quilting with friends – so I will finish this comment and go pack my stuff! 🙂
Is beautifool! congratulations!!!!
Rosy
http://www.quiltingmexico.com.mx
I love your tutorial – I took a class this past spring and now have four more blocks to finish, but of course, I'd forgotten exactly how to get a block started – now I can refer to your steps – thank you! Mary Ann @ RocknQuilts.blogspot.com I'm you're newest follower 🙂 I found you via Totally Tutorials
Thanks for the 'refresher course'! I'll begin working on a Double Wedding Ring pp quilt soon. Certain I will refer to this again.
Hello,
thank you for all the information and step by step photos.
Beatrice.
Great tutorial, thanks. I am thrilled that I found this great book at my local thrift store last week for $1.00!!! Now only if my machine wasn't in the shop I could start having some fun.
Gorgeous! Clear tutorial. Love the pattern, now I have another to use with a PP MiX CRAZY QUILT! ��
Thanks…
me gustara saber si uste vende los patrones de papel y como puedo hacer para comprar gracias ¡¡
Maria, the pattern is in the book by Carol Doak. Because of copyright issues I can't provide the pattern… Thanks!
mi direcion de correo ¡¡ mchacon64@hotmail,es
I can't find the block that was used in the tutorial in Carol Doak's Book. Can you tell me which one it is?
Mary Sutton [email protected]
The block is number 287 – I only used the top part of the block. I hope this helps!
Muito obrigada Denise.(Thank you)
I live in Brazil and I have the book but I never thought to use only a portion of the blocks.
thank you so much for sharing absolutely beautiful, wouldn't this be great for a boarder or for sashings around Christmas blocks.
Block 287 from which book by Carol Doak