
At this time of the year I search for ideas of gifts I can make for friends, teachers, my husband’s co-workers, and others who have affected our life in a positive way during the year. As I make the gifts, I am filled with gratitude for them… and hope they will feel it as they receive the gift. My requirements: the gift should not take hours to put together, it must be creative, and its materials must be easily found in nearby stores.
This year I made a Christmas wall hanging decoration depicting the Holy Family: Joseph and Mary holding baby Jesus. This handmade holiday gift fits my requirements, and its design can be changed to suit your taste (or the season).

Here is what you will need:
Wooden embroidery hoop, 5 inches
Background fabric
Scraps of blue, red, and green wool
Contrasting thread for applique
Scraps of tone-on-tone white fabric
Pearl bead
Small red button, medium star button
Burlap string
Red yarn
Glue gun, pinking shears
 |
||
| From scraps of wool cut pieces as follows: a 3″ x 1″ rectangle from blue, a 2.5″ x 1″ rectangle from red, and a 1–1/2″ x 1/2″ rectangle from green. Pin them to the background fabric (except green piece), with the burlap string behind the wool rectangles as shown above. |
 |
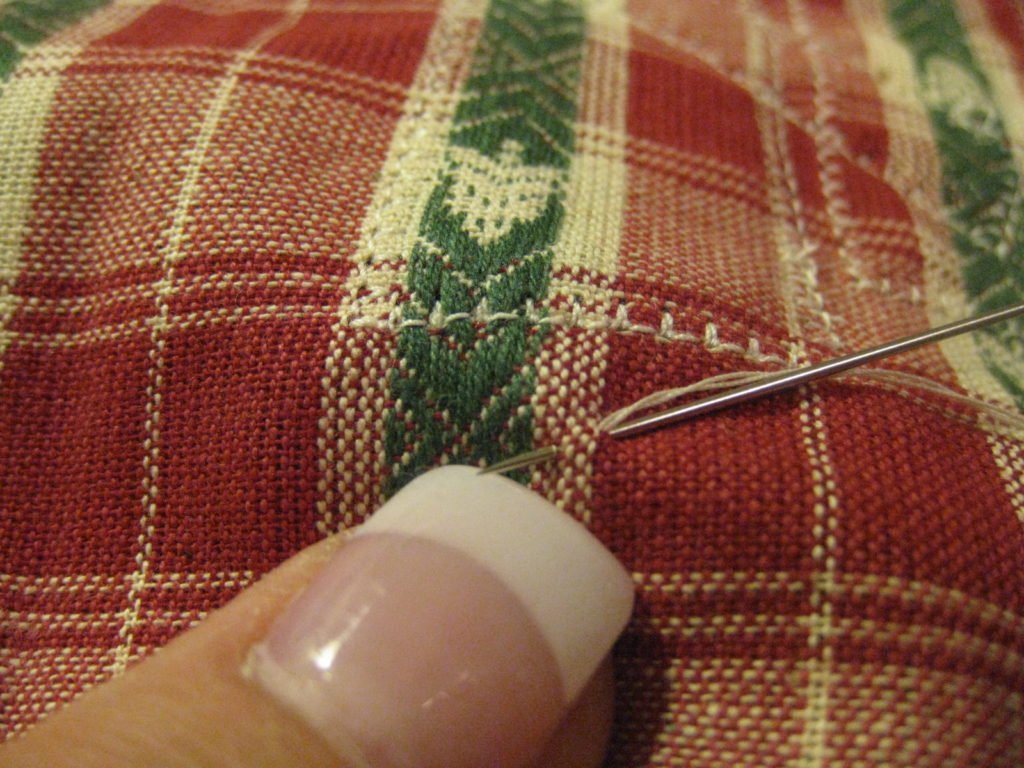
| Using a blanket stitch, machine applique the red rectangle, close to where the burlap string lays. |

 |
| Without breaking the thread and changing the stitch to a regular straight stitch, move on to the blue wool rectangle. Change back to blanket stitch and applique the piece, going over the burlap string to secure it in place. |
 |
| This is what the back of your work should look like – neat, no straying threads. |
 |
| Pin the green wool rectangle across the blue and red ones, making sure to cover the piece of burlap string and the straight stitches you made when going from one rectangle to the other. |


 |
| Make two yoyos for the heads (I used the Clover Yoyo maker, small… I had 5″ squares of tone-on-tone fabric, which I cut in four pieces, each piece being the right size for the yoyo maker.) Use a strong thread (quilting thread is a good option, as it will not snap when you pull the fabric together to form the yoyo), and do not cut it after you finish the yoyo, as you will use this same thread to tie it in place onto the background fabric. |


 |
| Secure yoyo to background fabric with a few small stitches. |
 |
|
| Do the same for Mary’s head, and then attach the pearl bead next to the green rectangle, as the baby’s head. |

 |
| Tie the burlap string across the figures with a double knot and bow. |
 |
| Center embroidery hoop over the scene to determine its position… |
 |
| … and hoop the fabric. |
 |
| With pinking shears, cut fabric to within a 1/4″ of hoop. |
 |
| Apply glue to hoop and fold fabric onto it. |

 |
| Trimming the fabric with pinking shears will prevent fraying, and the back still looks neat. |
 |
| Glue red button onto center of the burlap bow… |
 |
| … and glue star next to the metal fixture of the hoop. |
 |
| Cut about 9″ of yarn, feed it through the metal fixture of the hoop, tie two knots and trim it. It is done! |

I made 12 of these, using different colored stars on each one. I hope you like this idea and have fun making these wall decorations this Christmas! Then, think about Valentine’s Day, Easter, Fourth of July… just use appropriate designs and wool colors!

Very creative!
Thank you! They are a lot of fun to make…
Stop by often, and have a wonderful weekend!
This is very cute. I have a couple of rings I bought to make this type of project. Thanks.
hermoso trabajo.
Feliz fin de semana
Hey, these are cool! I'm really digging the teeny yo-yo's 😀
Very beautiful, I love it very much.
I think that for the support you also can use an old CD o DVD.
Thanks for the idea
Ciao
Norma