This Fat Quarter Halloween quilt pattern for beginners can be made in one day! Brighten your Halloween decor with this easy quilt, also perfect as a gift.

“Witches Party” measures 36″ x 36″ and the blocks finish at 8″. I used the Ghouls and Goodies fabric collection by Moda, yet you can use all your Halloween fabrics. It is Fat Quarter-friendly and very easy to make because you are only using regular piecing on the witch blocks, along with machine applique’.

The witch blocks come together easily as you can chain piece them. Instead of using templates for the triangles, or paper piecing this block, I came up with a beginner-friendly way to put it together, and here is the tutorial:
Witch Block tutorial

- For each of the five witch blocks, you will need the pieces shown above. So, cut them all according to the instructions in the pattern. Notice that the hat, hat brim, and the cape use the same fabric – in this case I am showing the gray print. I traced the triangles on the smooth side of the Heat’nBond Lite fusible web, the only product I use for machine applique’. On the photo, the triangles are not fused! They will be fused to the wrong side of the fabric.

2. I put all the pieces in place as they will look on the background, then I stitched the bottom part of each block at the same time, piecing, for instance, all the center squares to the left rectangle, then all the right rectangles to the previous unit – that is chain-piecing.

3. Next, stitch the brim of the hat to the top rectangle for all the blocks.

4. Sew the bottom to the top part, and all the backgrounds are ready. Of course, you can make the five blocks using the same fabrics. However, I like the scrappy quilt look on this Fat quarter Halloween quilt, so you may consider using assorted fabrics as I did.

5. Position the triangles on the block, as shown above, leaving 1/4″ on the bottom and on the top for the seam allowance. Fuse them in place. The top triangle – the hat – is positioned using the ‘eye-balling’ method: the bottom edge should more or less align with the tip of the bottom triangles – the cape! Repeat this step with the remaining blocks and then, onto the applique’.

6. Machine applique’ using the blanket stitch (or your favorite one – straight stitch close to the edges will work, too) and matching thread. In the photo above I am showing the center block of the quilt – the only one with the orange background. Lucky me – I had matching thread for all the fabrics I worked with. I am using Aurifil 40 wt on the top and in the bobbin.

Ta-da! Pretty cool, huh? I love that I did not have to fool around with many triangles to be stitched together and, although you know I love paper piecing, machine appliqueing the triangles makes the whole quilt assembly that much quicker.

For the applique’ blocks, I traced the shapes onto the fusible web. For the largest shapes, I like to remove the fusible web from their middle to give each block a softer hand. Follow the detailed instructions in the pattern to finish these blocks. Oh… I am loving them!


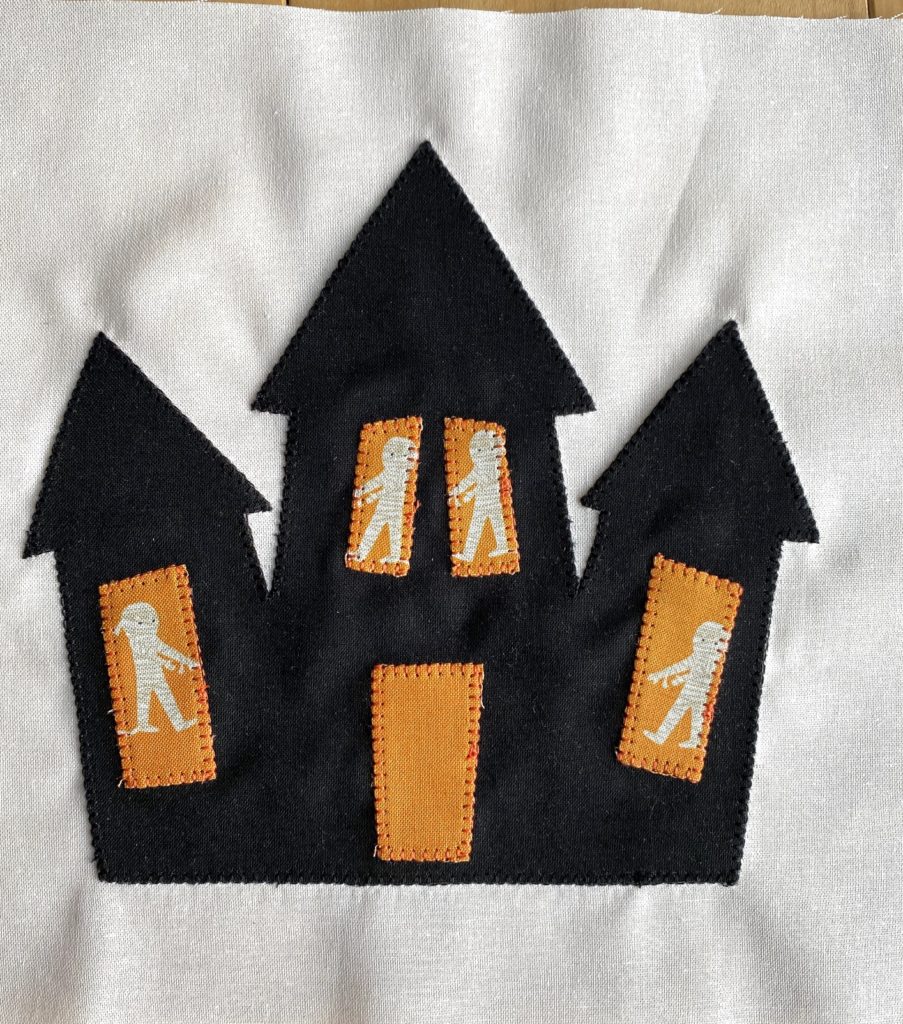
Didn’t they come out so cute? Yes, you’ve seen the haunted house before. I used the same design on the Haunted House quilt. As you can see, I have been in the mood for fall quilts of the spooky kind! This year, I have given you three quilt ideas for Halloween so you have no excuse – freshen up the Halloween decor!

And here is my quilt. It is pinned to be quilted but my Bernina decide to take a vacation for maintenance (bummer) so I will have to wait to show you the finished quilt. But, once the machine is back I will quilt it and bind it in no time because the size is manageable.
You can find Witches Party in my Etsy Store, PiecedBrain, or at a local quilt store near you. If they don’t carry it yet, have them contact me.
Have an awesome day!