This is the time when we all reach into our fabric stash and find materials for face masks. In this Easy to sew Face Mask: fast and comfortable blog post, you will see the steps I took to make my first (of many I know) face mask.
[Edited: July 21, 2020]
Before you go any further: if you are looking for face masks and are pressed for time, check out the ones I have listed in my Etsy store. I have sold over 500 masks and you might find something you like for yourself or your kids. I followed the steps below so you know how they were made!
Choose fabrics

You already know who gave me these fabrics if you read my previous post: my friend Deb! These are by Moda Fabrics – perfect for this project.
My goal is to select fabrics that will look equally good on men and women, will be appropriate for a professional setting, and will offer as much protection as 100% quilting cotton can.
It is correct, these will not compare to N95 masks. However, there are no masks out there! Doctors and nurses are pleading for help. Fabric masks can prolong the life of N95 masks, and that is a good enough reason for me to begin producing them. This comfortable face mask pattern is simple to make.
Select a mask pattern

Like you, I looked at many patterns on the internet. I chose to work with this pattern from Craft Passion. Joanne wrote a very detailed tutorial and the patterns are available in four sizes as downloadable PDFs. I am making all my masks using the ‘Men’ size original pattern. Unsure if anyone will have or take the time to add inserts to masks, the original pattern seems to be the best choice.
As I will make many, instead of tracing the shapes on paper I am using plastic for templates. With a permanent marker, I trace around the outside line on both the shape for the main fabric and the one for the lining. Then, I cut around the outline and my template is ready to use over and over again.
Trace and Cut the fabrics


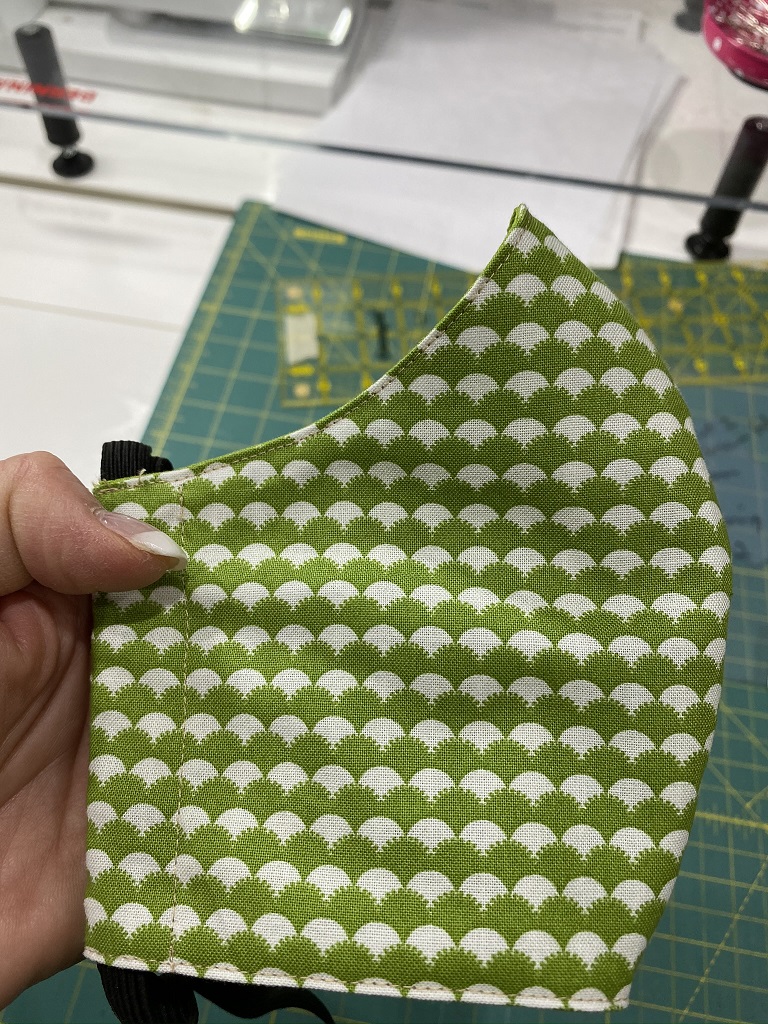
See how easy it is when you use a plastic template? On the main fabric template, I cut a little too much on the top right corner so I made a note to raise that line a little bit when I am tracing it on fabric.
Also, notice that it is written: “cut 2”. However, since I folded the fabric, I can cut only once and get the two pieces I need from the shell fabric (main) and from the lining fabric.
Sew mask


I continue to follow Joanne’s directions (I printed the tutorial and took it to my studio). The fabrics were right side together, the curved edges are stitched and clipped so the seam will behave. She tells us to topstitch close to the seam to secure the seams in place, and so I did it.
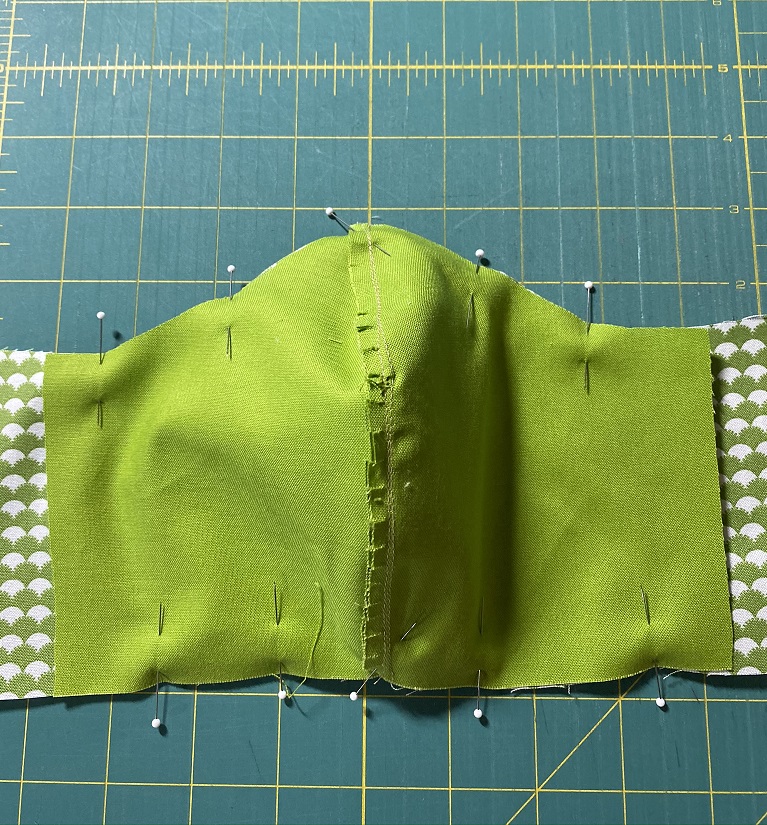

With right sides together, the shell and lining are pinned and stitched together. I backstitched the beginning and the end of each sewing line.

Next, I flip the mask inside out, press the seams, and topstitch from edge to edge on both top and bottom of the mask. It is really easy to sew a face mask that is fast and comfortable at the same time…


The casing for the elastic, or fabric tie when we can no longer find elastic, is ready now.
Thread elastic through the mask


Now, get a small safety pin and begin threading the elastic from the right bottom corner of the mask. Why, because this mask will not be secured behind the ears, but behind the head!
Two weeks ago I flew to California to spend the weekend with my oldest son and his two boys. I wore an N95 mask from the moment I parked at the airport to the moment I arrived in Cali and got my rental car. Let me tell you: my ears hurt so much! That is why I am threading the elastic as above (Joanne offers that option on her pattern, too, which is another reason why I chose her version).

When I went to the store to buy elastic last week, I could only find black elastic so I got the 1/2″ and the 3/8″. I got a dozen of each and it will have to do.


Once the elastic is in, pin its two ends together, stitch them well, and slide the joined ends into one of the side casings to hide it. How comfortable is this mask? I was not joking with I said I would show you an Easy to sew face mask that was also fast and comfortable.

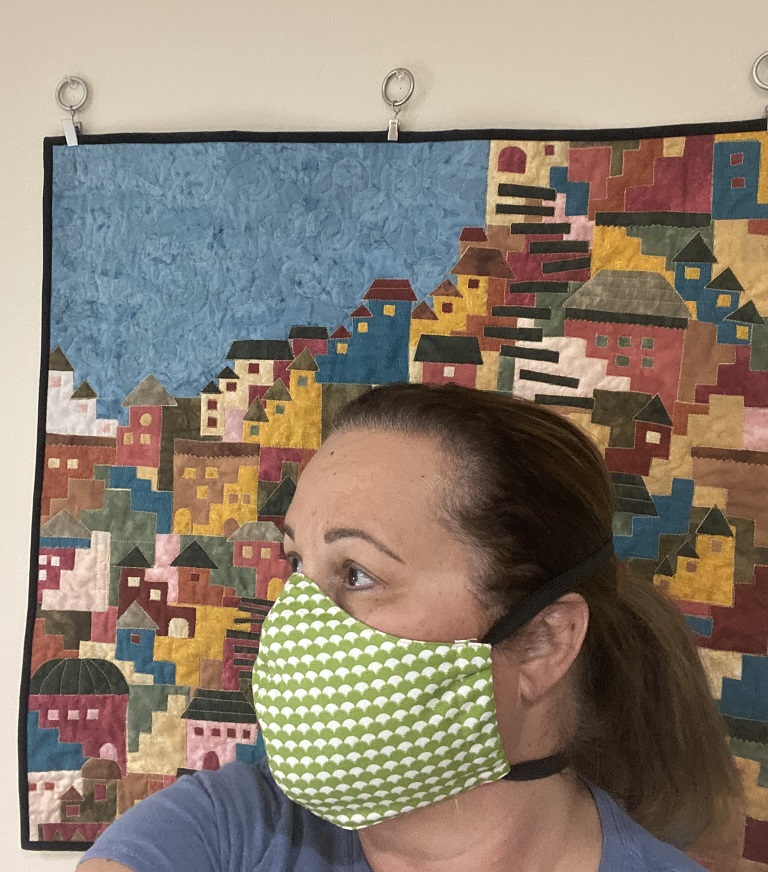
This mask fits snuggly over the nose and under the chin. It will not slide – I used a 28″ length of the elastic. I may also try the women’s size to see how it fits and maybe make half of one size and half of the other.
This is my first mask and it took me about 20 minutes to make. I will cut many at a time, chain piece them, and then I will let you know how many I can make a day. It sounds like a perfect project for the next couple of days. What are your plans for weekend sewing?
I wrote another blog post with 4 easy ways to tie your face mask including paracord. Check it out for alternatives to elastic.
JoAnn stores are collecting these masks and they have a page on their website totally dedicated to this effort. This should help if you don’t know how to get your masks to those who need them.
Do not forget to enter the fabric Giveaway – the winner will be revealed on Monday. Those fabrics would make great masks, too!
Enjoy your weekend,

This looks much quicker (and more comfortable) than the pleated ones I was trying to make! Thank you!
LOL My email popped up as my business one….please don’t reply to that. quiltnsrepatyahoodotcom
Thank you! Do I have your permission to post this on my quilt guild Facebook page. My guild is making masks and this looks like a good one.
Thank you
Yes, you do! These masks are very comfortable. I trace them all, cut them all, chain stitch them, you know the drill!
Se cuida minha amiga.Obrigada por tutorial tão bem feito ;Beijo Grannnnde Deus a abençoe e aos seus.
Voce tambem! Que tempos as gente esta’ vivendo, hein?
Thank you so much for the great photos (I’m a visual learner, lol) and clear instructions! Went to Joanna’s page to grab the pattern….so much quicker and easier than the others I had tried! Hubs says it is way more comfy, too. Thanks again!
I know, right? It fits very well over the nose, stays there, and having the elastic away from the ears is such a blessing!!! Have a great week,
Denise
I’ve been stitching a small (3”-4”) wire across the nose section once front and lining are together. I used twist ties and zig zag over it. Others are cutting small strips of disposable aluminum pans if they don’t have thin wire.
I use this same pattern and also fusible interfacing, but I’m about out so will leave out of next ones. Thanks for providing the elastic length for this method! I’m using twill tape for ties when I’m out of elastic. It works great too!
Dara,
That is perfect! I will soon be out of elastic so I will try the twill tape for ties. This mask sits well on the nose but I bet the wire or twist ties provide added support. Keep sewing!
Are you using 28 inches of elastic to make both straps. (Meaning you are cutting it into 2 pieces)?
Laura,
I use a single 28″ length of elastic and use a safety pin to thread it through both casings. Then, I stitch the elastic ends together, slide it into one of the casings to hide it, and sew a few stitches on top of the casing so the elastic will be secured to one side (and the stitched ends won’t show through). Makes sense? Do not cut elastic in two.