If you are looking for embroidery patterns for beginners, this book is perfect for it. Look at this small embroidered patchwork project I just finished and you will see how you can make it, too!
[Edited: July 7, 2020]

A while ago I talked about Gail Pan’s book “Patchwork Loves Embroidery Too” and my plan to make one of the amazing projects in her book, as it is full of embroidery patterns I love. Well, here it is! This weekend I carved time away from moving preparations (yep, in a few weeks we will be moving) and finished it, albeit with a few changes from Gail’s instructions.

This book has small embroidery patterns using simple stitches that are ideal for beginners, yet super cute and interesting for veterans alike. If you are new to this craft, the last thing you want is to jump into a very involved, long project. I suggest you begin with one of her needle books, for instance.
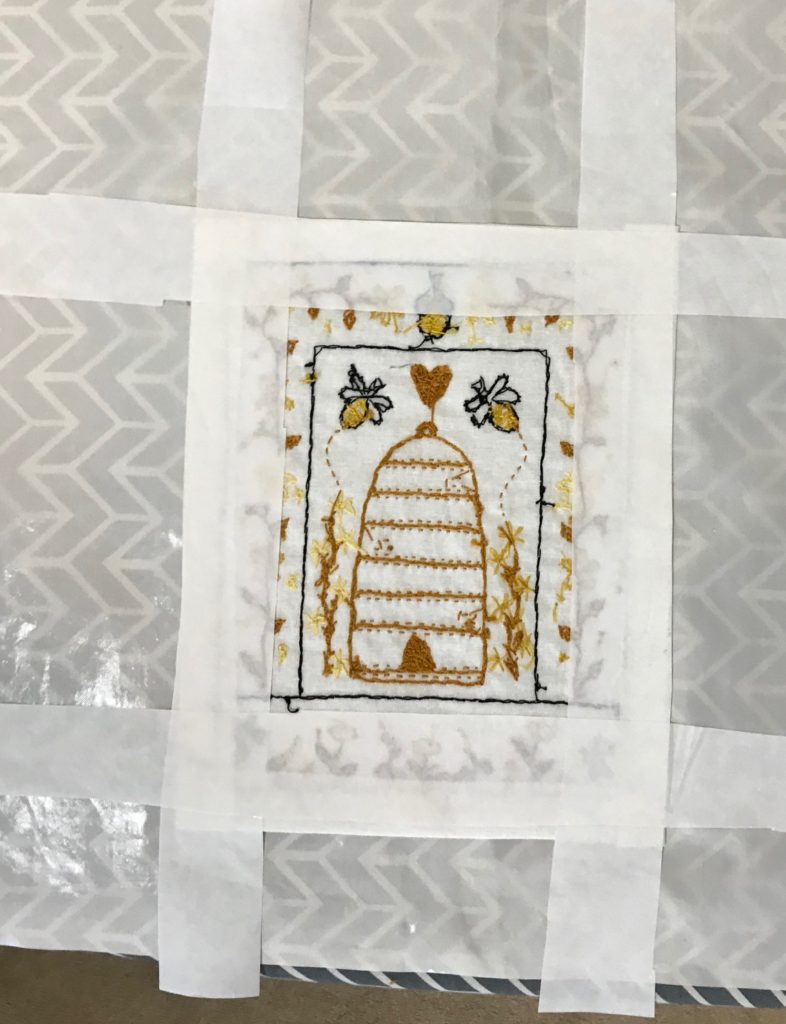
As I said, I wanted to make one of her patterns. This is the one I chose:

I fell in love with this wall hanging when I saw it in Gail’s book. I looked in my fabric stash for fabrics that might have the same feel as the ones she chose and began. The instructions are very detailed – a must for us who are not yet super comfortable with embroidery and/or patchwork.

The frame around the center embroidery design is handstitched. I knew I would not have time to hand stitch anything so I reached for my trusted Heat ‘n Bond Lite, traced the templates for the dark frame onto it, making them hollow for a softer hand, and it worked so well.

My stash of fabrics is amazing. I found the perfect background fabric for this wall hanging and began putting the pieces together. The dark frame was carefully placed on the yellow background fabric. Before I fused it, I placed the embroidery work on top of it to ensure everything looked good.
Look at my hand stitching – not perfect! I had to rip out some of them and redo a few straight lines that weren’t so straight. In truth, do you think anyone will look at this work and say: “Dang, how can she show this online?” I don’t think so…
Notice that I pressed under the edges of the embroidery work but I had no intention (read ‘time’) to needle turn it. I cut four strips of the Heat ‘n Bond Lite fusible web and fused them to the folded edges. Then, I peeled off the fusible web, centered the embroidery work over the dark frame and machine appliqued using a blanket stitch.
You can see on the photo above that I protected my ironing board cover with an applique’ pressing sheet because I did not want the glue from the fusible web to get stuck to it. If it gets stuck to the pressing sheet I can easily remove it. Not so easy when it is glued to the cover fabric.

For the life of me, I can’t understand why my black hand stitches were so NOT straight. I have done much better work! I even ripped it all out and stitched again, only to make wavy lines one more time. It seemed it was ‘supposed’ to look that way, so here it is.
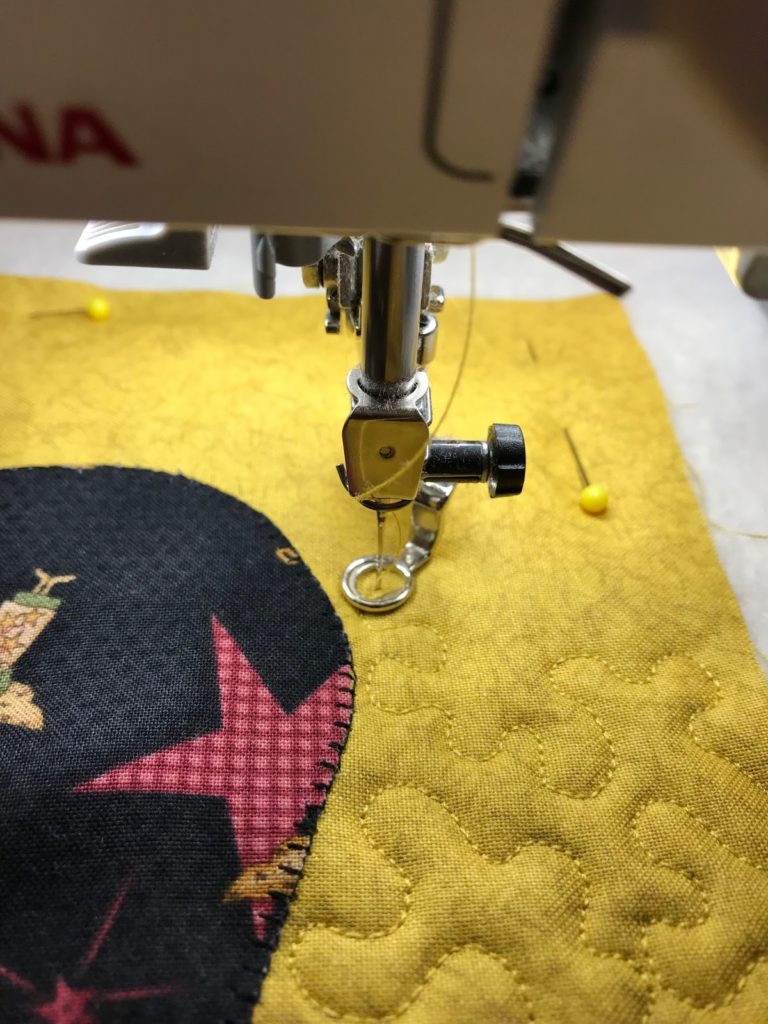
Once the frame and the embroidery were fused, I switched the presser foot on my sewing machine to a wider and transparent one. Using 40wt thread and the blanket stitch, I machine appliqued it to the dark frame.

I switched threads to a black one and appliqued the frame to the background. This way, I saved some time and the wall hanging is just about ready.

This is what the back looked like when I was done. The black stitches going toward the center mark where I joined the frame pieces. More about that in a little bit.
The backing, the batting, and the quilt top were pinned together. My bees came alive and their trails became the free motion quilting motif. I quilted with the same thread from the blanket stitch applique’ on the edge of the embroidered center: Aurifil 40 wt.
I did not quilt on the frame except very close to the edges of the embroidery work as I wanted it to puff up. It does because, as you saw above, I removed the fusible web from most of the center of each quarter of the frame, leaving just enough around the shape edges to fuse them to the background. Also, I quilted over the black embroidery lines only.

I found in my binding drawer a piece of leftover binding in the right length – this flannel. I did not plan on hand stitching the binding, so I secured it to the back of the work then flipped it to the front and machine stitched it. Notice how I use the walking foot to apply the binding onto the quilt – it handles thickness better than the 1/4″ presser foot.

Where the pieces of the frame came together I appliqued them then covered the edges of the fabric with this fabric marker so there would be no white peeking through.
And here it is. Because I did not needle turn the black frame, the finished work is a bit larger than Gail’s, measuring 17-1/2″ x 18-1/2″. It will hang either in my new office or new studio, but it will be in full view forever because I love how it turned out.
I love books with simple embroidery patterns. If you are looking for more, check out the Book Reviews page on this blog for other books with them.
Between looking for a new place and packing to move into it, you will hear from me now and then until we are settled. I have oodles of patterns to deliver so, yeah, I am going into hiding. Maybe.
Have a fantastic day!

Thanks for sharing your bee-utiful project. I really enjoyed the closeups of your process.
Cool! The photos explain it best!
It is adorable!! Thank you for showing how you finished it. Hugs,
Thanks! That's for when you want to finish the project but do not have a bunch of hours!
Just love it!
Thank you! I am so glad I decided to finish it.
It is just wonderful! I just purchased Patchwork loves Embroidery and am going to choose a project soon.
That book has fun projects – I love them all! Thank you!
That looks incredible! You stitching is beautiful and the colors are just wonderful with it.
Thank you! I love how it turned out!